
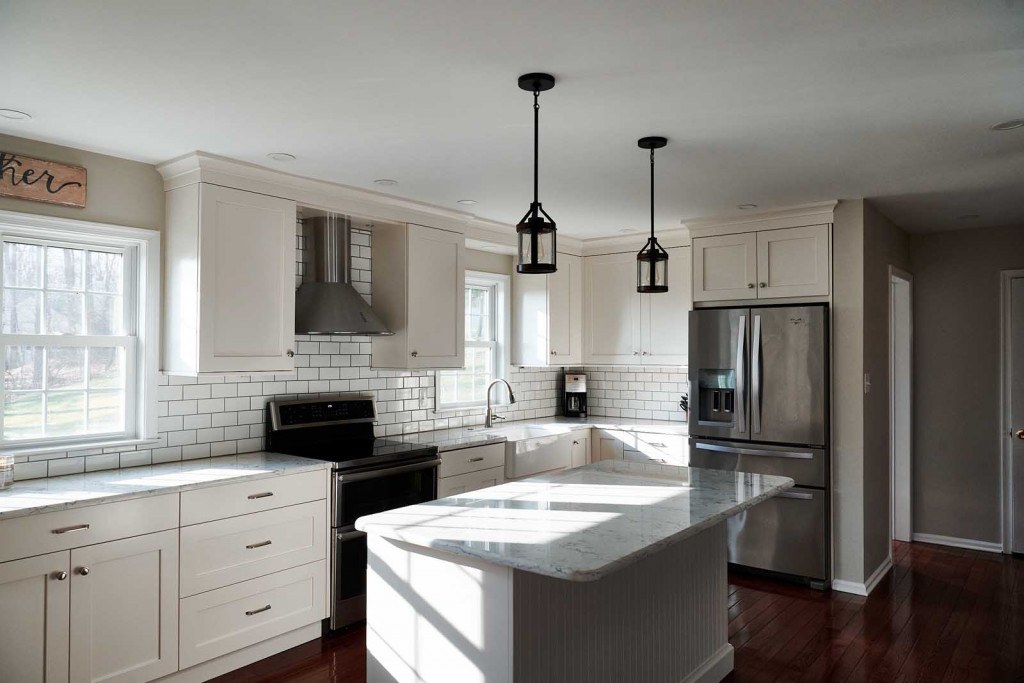
What Are the Biggest Kitchen Remodel Mistakes in Southeastern PA (And How Do You Avoid Them in 2026)?

The design, layout, and contractor mistakes that quietly wreck a kitchen remodel — and how to avoid every one.

Not ready for a call? Send us a quick question

Key Takeaways

  • Kitchen remodel mistakes break into five categories: design regrets, material/spec mistakes, layout/workflow mistakes, contractor problems, and life-disruption mistakes. The most expensive are discovered AFTER demolition.
  • The work triangle (sink → stove → fridge) should total no more than 26 feet, with no single leg over 9 feet or under 4 feet (NKBA guideline). Most “weird-feeling” kitchens fail this test, and fixing a layout after install runs $15,000–$60,000+.
  • Allowance traps are the #1 reason a $55,000 bid finishes at $78,000 — cabinetry is 30–40% of the budget, so a lowballed cabinet allowance cascades through every other line. Fedor’s fixed-price contracts eliminate this.
  • An oversized island is the single most common design regret: $0 to prevent at design time, $8,000–$25,000 to fix after install. Tape out the footprint on your real floor before selections lock.
  • Plan for 12–16 weeks of elapsed kitchen-disruption time — not 8–12 weeks of active construction. A working temporary kitchen with a microwave, hot plate, and sink access is non-negotiable.

Kitchen remodel mistakes fall into five categories:

  1. Design regrets — an island sized wrong, hardware that fights the cabinetry, open shelving you don’t actually want
  2. Material and spec mistakes — marble in a working kitchen, cheap drawer slides, the wrong sink
  3. Layout and workflow mistakes — a broken work triangle, a fridge that blocks a doorway, no prep zone
  4. Contractor problems — allowance traps, undocumented cabinet damage, a wall removed without engineering
  5. Life-disruption mistakes — underestimating the 12–16 weeks without a kitchen, a missed holiday deadline, a temporary setup with no microwave

The most expensive ones are the mistakes you don’t catch until after demolition.

This article is for the anxious-but-serious homeowner across Chester County, Delaware County, and the Main Line who wants a contractor’s honest take — not another content-mill listicle that says “it depends.”

We’ve installed kitchens in pre-2000 colonials, 1940s Main Line stone homes, and 1990s subdivisions throughout this market. Almost every mistake below is one we’ve caught early for a client or been called in to fix after someone else missed it. Most are preventable.


How Do Kitchen Remodel Mistakes Break Down (And Why Is This Article Organized This Way)?

Most “kitchen mistakes” articles online are written by content mills who have never installed a cabinet in a Downingtown colonial or a Wayne stone home on the Main Line. They give you a flat, unranked list of ten items and no usable mental model. We work across Chester County, Delaware County, and the Main Line, and we organize the mistakes into five categories because that’s how they actually happen on a jobsite — and because knowing which category a worry belongs to tells you who is responsible for catching it and when.

Yes, this is opinionated. We have opinions because we’ve seen what works and what doesn’t on hundreds of local jobsites — West Chester, Malvern, and Exton in Chester County, Media and Newtown Square in Delaware County, and Wayne and Bryn Mawr on the Main Line. When we say “we don’t do open shelving as primary storage because clients regret it,” that’s not a hot take — it’s a year-three follow-up email we’ve gotten more than once.

“Honesty is the brand. The most expensive kitchen mistakes are the ones a homeowner can’t catch — and the ones a homeowner CAN catch early are the ones a good contractor warns them about, every time, even when it’s awkward.” — Alex Smearman, Owner, Fedor Fabrication

Here’s the five-category map, with what each one costs to fix if it slips through:

CategoryWhat Goes WrongWho Catches ItCost to Fix After Install
1. Design regretsIsland too big, trendy cabinet color, busy backsplash, open shelvingYou + your designer, during selections$1,500–$25,000
2. Material/spec mistakesMarble in a working kitchen, cheap drawer slides, 2 cm tops, wrong sinkYour contractor’s spec sheet$600–$15,000+
3. Layout/workflow mistakesBroken work triangle, no prep zone, fridge blocks a door, trash far from sinkYour designer, during space planning$1,500–$60,000+
4. Contractor problemsAllowance traps, no engineering, sub-coordination failures, undocumented damageYou — by asking the right questions before signing$5,000–$40,000+
5. Life-disruption mistakesUnderestimating elapsed time, no temporary kitchen, missed holiday deadlineYou — by planning before demoMoney + sanity

What Are the Most Common Kitchen Design Regrets? (Category 1)

These are the mistakes homeowners email us about a year after the project is done. They love the kitchen — except for one or two things they wish they’d done differently. Most are decisions we can talk through during selections (the phase where you choose every finish, fixture, and material before construction starts), if you bring them up in time. Most aren’t expensive to prevent. All of them are expensive to undo.

Why Is an Oversized Island the Most Common Kitchen Mistake?

The mistake: a 9-foot island dropped into a kitchen with about 8 feet of clear floor on each side. It looks spectacular in the rendering and blocks the workflow in real life. You can’t open the dishwasher and the oven at the same time. Two people in the kitchen feels like a traffic jam.

The standard here comes from the NKBA Kitchen & Bath Planning Guidelines: a minimum of 42 inches of walking clearance around an island, and 48+ inches if two people cook at once. Thirty-six inches is too tight for a working kitchen, even though it looks fine on paper.

  • Cost to prevent: $0 — it’s a design decision.
  • Cost to fix after install: $8,000–$25,000 (new island cabinetry, new countertop, often electrical relocation for the island circuit).
  • Prevention: tape out the island footprint on your existing kitchen floor with painter’s tape before selections lock. Live with it for a week. If it feels tight with tape on the floor, it will feel tighter with cabinets and a countertop in the way.

What’s the “Weird Gap” Mistake With Cabinets to the Ceiling?

The mistake: 9-foot ceilings with 36-inch wall cabinets, leaving a 6-inch dust-collecting gap on top — or cabinets running flat to the ceiling with no soffit (the boxed-in space between the top of the cabinets and the ceiling), no crown molding, and no step. Both read as unfinished.

The fix is one of three approaches: stacked uppers (a shorter glass-front cabinet sitting on top of the standard wall cabinet), a defined soffit, or crown molding carried to the ceiling.

  • Cost during the build: $400–$2,500 for the upgraded approach.
  • Cost to fix after: roughly $3,000–$6,000 to strip and redo the upper run.

Our opinionated take: never run flat-top wall cabinets with a 6-inch ceiling gap. It is the single most common “looks builder-grade” tell in an otherwise nice kitchen, and it costs almost nothing to avoid if you decide before the cabinet order is placed.

How High Should Pendant Lights Be Over an Island?

Hung too low (under about 30 inches above the counter), you bonk your head leaning over the island. Hung too high (above 36 inches), the fixtures look disconnected and don’t light the work surface. Wrong scale is its own problem: three small pendants over a 9-foot island look like dollhouse fixtures.

Rule of thumb: the bottom of the pendant sits 30–36 inches above the countertop, and the total pendant width should be one-third to two-thirds of the island width.

  • Cost to fix if the rough-in is in the right spot: $200–$800.
  • Cost to fix if the rough-in (the in-wall/ceiling wiring stub set before drywall) has to move: $1,500–$3,000.
  • Prevention: approve pendant scale and placement during selections, before the electrician roughs in. Mock the fixtures with paper templates taped to the ceiling if you need to see it.

What’s the Backsplash Regret Nobody Warns You About?

The mistake: picking a busy mosaic or heavily veined slab backsplash that fights with an already-busy countertop. A Calacatta-look quartz top with a Carrara marble mosaic backsplash is a visual war — your eye doesn’t know where to land.

The rule: when one element is busy, the other should be calm. If you fell in love with a dramatic veined countertop, the backsplash should be quiet — subway tile, a large-format calm tile, or a slab backsplash that matches the counter.

  • Cost to fix: $1,500–$6,000+ to remove and replace tile, and you’ll usually need to repaint the wall too.

Does Cheap Hardware Really Ruin Premium Cabinets?

The mistake: $20,000 of inset Shiloh cabinetry with $4 big-box pulls. Hardware is the one thing your hands touch every day. Cheap pulls on premium cabinets feel wrong instantly, and a finish mismatch (matte black Top Knobs pulls on a polished-nickel kitchen) reads as inconsistent.

Our opinionated take: budget roughly 1.5–2.5% of your cabinetry cost on hardware. On a $30,000 cabinetry budget, that’s $450–$750. Going below that is a false economy you’ll feel every morning.

  • Cost to fix: $400–$2,000 to swap pulls (parts plus labor). An easy fix — but annoying to live with until you do it.

Should You Do Open Shelving in a Kitchen?

Our honest opinion: most of our clients who specify open shelving regret it within a year. Dust, cooking grease, the visual chaos of mismatched dishware, and the constant low-grade pressure of “is it styled right?” The Pinterest version assumes a curated dish collection and someone who dusts weekly.

Where it works: a single accent run with display-only items — cookbooks, plants, a few ceramic pieces — in a lightly used kitchen or one with a butler’s pantry doing the heavy lifting. Where it fails: as primary daily-use storage in a working family kitchen.

  • Cost to convert open shelving to closed cabinets later: $1,500–$5,000+, depending on run length and the tile around it.
  • Prevention: ask yourself honestly during selections — “Do I actually want to look at my dishes every day?” Most people don’t.

Will You Regret a Trendy Cabinet Color in Three Years?

Trend-chasing cabinet color is a slow-motion regret: greige in 2018, navy-lower/white-upper in 2021, sage green in 2024. Kitchens last 15–20 years. Trend cabinets date faster than the appliances do.

Our take: choose a color you’d still be happy with in a 1995 photograph. White, off-white, light gray, warm wood tone, deep walnut, and classic navy don’t date. “Quirky teal” does.

  • Cost to repaint cabinetry later: $3,500–$8,000+ for a professional spray finish on a typical kitchen.
  • Prevention: pull up high-end real-estate listings from five and ten years ago. The kitchens that still look great are almost never the trendy ones.

What Material and Spec Mistakes Should You Avoid in a Kitchen Remodel? (Category 2)

These are the mistakes that show up after a year of using the kitchen — the countertop you can’t set a hot pan on, the drawer that won’t stay closed, the sink that scratches every time you wash a pot. Most of them aren’t fixable without ripping something out, which is exactly why getting the spec right on paper matters more than almost any design choice.

Are Marble Countertops a Mistake in a Working Kitchen?

The mistake: white marble countertops in a kitchen used by a family that actually cooks. Lemon, vinegar, tomato, and wine all etch the surface. You can seal marble to slow staining; you cannot make it acid-resistant. Sealing and etching are two different problems, and the showroom rarely explains that clearly.

Our position: marble belongs in butler’s pantries, dedicated baking islands for a serious baker who accepts patina, and statement pieces — not on a primary working countertop in a house with kids. The alternative that gets you 90% of the look with 100% of the durability is marble-look quartz: Cambria Brittanicca, Caesarstone Statuario, or Silestone Calacatta Gold. We go deeper in our quartz vs. granite countertop comparison.

  • Cost to replace etched marble countertops: $4,000–$15,000+ depending on square footage.

What we tell our clients about marble: we don’t talk anyone out of it. Marble is genuinely beautiful and there are kitchens where it’s the right call. What we do is make sure homeowners walk into the decision with full eyes open — lemon, vinegar, tomato, and wine all etch the surface; sealing slows staining but does nothing for etching; and a working family kitchen with kids will develop a patina they may or may not love. Plenty of our clients pick marble anyway and are happy with it because they accepted the tradeoff up front. The ones who get frustrated are the ones who weren’t warned.

What’s Wrong With the White Composite Sink Everyone Picks?

The mistake: an undermount white granite-composite sink in a working kitchen. It scratches from cast-iron pans, stains from coffee, and is harder to keep clean than the showroom photos suggest.

Our take: a stainless steel undermount sink (16- or 18-gauge — the lower the number, the thicker the steel) is the right answer for about 90% of clients. A workstation sink with integrated accessories (Kraus, Ruvati, or Kohler Prolific) adds real daily utility. If a client genuinely wants white, fireclay (Kohler Whitehaven, Rohl Shaws) holds up far better than composite — but it costs $800–$2,000 more.

  • Cost to swap a sink later: $600–$2,500 (sink, plumber’s time, and countertop modification if the new sink’s shape differs).

Why Do Cheap Drawer Slides Make a Kitchen “Feel Cheap”?

The mistake: cabinet boxes spec’d with low-grade drawer slides — typically Euro-style side-mount units rated for 75 pounds, or no-name ball-bearing slides. By year five the drawers slam, sag under heavy items, and won’t fully close. The kitchen “feels cheap,” and the underlying reason is hardware nobody mentioned during selections.

The right spec is full-extension undermount soft-close slides (Blum, Salice, or Grass) rated for 100+ pounds. “Full-extension” means the drawer pulls all the way out so you can reach the back; “soft-close” means it self-closes from a half-inch open without slamming. This is the standard on Shiloh, Great Northern Cabinetry, and any reputable line. The check at the showroom: open every drawer. If it doesn’t pull all the way out and self-close from a half-inch open, it’s the wrong slide. The AWI Quality Standards define cabinet construction grading if you want the trade reference.

Is a 2 cm Countertop a Mistake?

The mistake: a 2 cm (3/4-inch) quartz or stone slab with a built-up edge that’s laminated to look like 3 cm (1.25-inch) at the front edge but is structurally thinner across the whole span. It’s cheaper, but more prone to cracking at the sink and cooktop cutouts.

The right spec is a 3 cm slab at full thickness with no built-up edge. That’s the regional standard and what every reputable fabricator quotes by default here.

  • Cost difference: 3 cm typically runs 10–20% more than 2 cm with a built-up edge. Worth every dollar.
  • The check: ask the contractor to put it in writing — “3 cm slab, full thickness, no built-up edge.”

Should You Use IKEA Cabinets or Shiloh? (When Each Is the Mistake)

The mistake on the cheap end: a $75,000 kitchen budget with $4,000 of flat-pack IKEA particle-board boxes. Premium countertops, premium appliances, premium labor — all fighting against the weakest link. The mistake on the high end: $50,000 of full-custom Wood-Mode cabinetry in a kitchen where semi-custom Shiloh would have done the same job for half the money and 10 fewer weeks of lead time.

Our take: most of our clients are best served by Shiloh (semi-custom, plywood box, dovetail drawers, real wood, 4–6 week lead) or Great Northern Cabinetry (full custom, 8–12 week lead, every option open). IKEA is fine for a rental flip; it is not the right cabinet for a forever home. For the full breakdown, see our honest comparison of stock vs. semi-custom vs. custom cabinets.


What Layout and Workflow Mistakes Make a $90K Kitchen Feel Like a $40K Kitchen? (Category 3)

These are the mistakes you live with three times a day. They’re invisible in renderings and impossible to ignore once the kitchen is in. They’re also the mistakes that make an expensive kitchen feel cheap — because no countertop upgrade fixes a layout that fights you every meal. If you’re working in an older home, our guide to the best kitchen layouts for older homes goes deeper on what actually fits a pre-2000 floor plan.

What Is the Work Triangle and Why Does It Matter?

The work triangle is the path between your three heaviest-use points: sink, stove, and refrigerator. The NKBA guideline: the three legs together should total no more than 26 feet, with no single leg longer than 9 feet or shorter than 4 feet. Most kitchens that “feel weird” fail this test.

Broken looks like a stove and fridge on opposite ends of an open-plan kitchen with a 12-foot island marooned in the middle — 30+ feet of walking just to make breakfast, and two cooks colliding constantly. Modern zone-based design (a prep zone, cook zone, and cleanup zone) has softened the rigid triangle, but the underlying rule is the same: the heavy-use points should be close together.

  • Cost to fix after install: $15,000–$60,000+. Any post-install layout change means new plumbing, electrical, cabinets, and countertops — essentially redoing the kitchen.

Will Your Refrigerator Door Block a Doorway?

The mistake: a counter-depth fridge installed two inches from a perpendicular doorway. Open the fridge and you can’t walk through; open the door and the fridge handle hits the wall. This gets missed because fridges are spec’d by width and depth, not by door-swing arc — a 36-inch French-door fridge needs noticeably more than 36 inches of usable space.

The check: allow at least 4 inches of clearance on the hinge side for the door-swing arc, and physically verify the door clears any wall, doorway, or perpendicular cabinet at full open (typically a 90–120 degree swing).

  • Cost to fix: $400–$2,000 (shim or relocate a cabinet, flip the door swing, or — worst case — a different fridge model). Best case: catch it during selections and it never becomes a problem.

Why Does a Kitchen Need a Prep Zone Near the Stove?

The mistake: the stove on one wall and every horizontal surface 6+ feet away. Where does the cutting board go? The bowl of chopped vegetables? The hot pan straight out of the oven? This gets missed in tight kitchens when a designer crams the stove between the fridge and dishwasher to “save space.”

The fix: a minimum of 18–24 inches of countertop on each side of the cooktop, ideally 36+ inches on the primary working side.

Where Should the Trash Pull-Out Go?

The mistake: a trash pull-out at the far end of the kitchen, away from the sink. You scrape every plate over the trash, then carry the dirty plate to the sink — every meal, three times a day, for the next 15 years.

The fix: trash pull-out within 3 feet of the sink. Even better, a dual pull-out (trash plus recycling) directly under or beside the sink. This is a $0 fix at design time and a $1,500+ fix to relocate after install.

How Many Outlets Does a Kitchen Island Need?

The mistake: a 10-foot island with one outlet hidden behind a dishtowel rod. You can’t run a stand mixer, a phone charger, and a slow cooker at the same time.

The code floor: PA adopts the International Residential Code (IRC) 2018 through the PA Uniform Construction Code (UCC), which requires receptacles roughly every 24 inches along countertops and at least one outlet serving an island of usable size (newer code cycles have expanded island receptacle rules further). Your contractor should know this — most do — but the final count and placement are still a design decision.

Our take: spec 4–6 outlets across an island — flush side-mount outlets, pop-up units, or integrated USB-C. Plan for what you’ll actually use at the island.

  • Cost to add outlets after install: $300–$800 per outlet (electrician, countertop modification, drywall and paint).

What Contractor Red Flags Cause the Most Expensive Kitchen Mistakes? (Category 4)

This is the category nobody else writes about honestly. Most contractor blogs won’t list contractor red flags because their own bid would fail half of them. We’re going to list them anyway. For the full deep-dive on vetting a contractor, see our guide on how to choose a remodeling contractor and our contractor red flags breakdown — this section is the kitchen-specific version.

What Is an Allowance Trap in a Cabinetry Estimate?

An allowance is a placeholder dollar amount in a bid for materials you haven’t selected yet — for example, an “$18,000 cabinet allowance.” The trap: cabinetry is the single largest line item at 30–40% of the budget, so an allowance set artificially low to make the bid look competitive almost always grows during selections. We’ve seen $18,000 cabinet allowances become $34,000 final invoices. Then the countertop allowance, tile allowance, and appliance allowance all blow through too, and a “$55,000 bid” finishes at $78,000.

A fixed-price contract (the number in the proposal is the number you pay) eliminates this, because every selection is locked before you sign. This is the difference between knowing your number and hoping your number holds. Our what does fixed-price remodeling mean guide explains exactly how that works, and what’s included in a remodeling estimate shows how to compare two bids that look different on paper.

A homeowner came to us mid-project, frustrated. They’d specified a beaded-inset cabinet package up front — one of the highest-end options in the cabinet spectrum — and what had been installed was builder-grade plywood-box cabinetry. The contractor before us had used a low cabinet allowance to keep the original bid attractive, and every meeting from selections onward was a step up the dollar ladder as the homeowner realized the allowance figure bore no real relationship to what they’d actually picked out. By the time we walked the site, the gap between the original number and where the project had landed was tens of thousands of dollars — and the beaded-inset cabinetry they’d been promised was still nowhere in sight. This is exactly the failure mode a fixed-price contract is built to prevent.

What Happens When a Contractor Says “We’ll Figure Out the Appliance Install Later”?

The mistake: the contractor never asks about your appliance package up front. Cabinets get built, drywall goes back up, and then the 36-inch range you ordered needs a 36.25-inch opening — or the panel-ready dishwasher needs door panels nobody specified.

What good looks like: appliance specs locked at design time, every cabinet built around the actual model (or its dimensional spec sheet), and plumbing, gas, electric, and venting all pre-coordinated. We work with Gerhard’s Appliances in Malvern specifically because they coordinate delivery with the construction schedule instead of dropping a pallet in your garage eight weeks early.

  • Cost when it goes wrong: $500–$5,000 in cabinet modifications, drywall repair, electrical reruns — or a substituted appliance because the original no longer fits.

Do You Need an Engineer to Remove a Kitchen Wall?

The mistake: a contractor “knows it’s not load-bearing” without an engineer’s stamp. Sometimes they’re right. Sometimes the second floor sags six months later. Under IRC 2018, any wall carrying load (floor joists, a ridge, or a point load from above) requires engineered specification — beam size, post sizing, foundation point loads, and header dimensions.

We work with Rise Engineering on every wall removal involving load-bearing structure. Their stamped spec is part of the permit submission to the township.

  • Cost of doing it right: $400–$1,500 for engineering plus $2,000–$8,000 for the engineered beam and proper installation.
  • Cost of doing it wrong: thousands in foundation repair, structural retrofit, and possible insurance and liability problems if it fails.
  • The check: ask directly — “Will an engineer spec the beam, and can I see the engineering letter in the permit package?” If the answer is “we don’t need that,” walk.

Why Does the Order of Operations Matter So Much?

The mistake: the countertop fabricator measures from drawings instead of from installed cabinets. Field conditions always differ slightly from drawings, so the countertop comes back 1/4 inch short with a visible gap at the wall. The right sequence is non-negotiable: cabinets installed and leveled, then the fabricator laser-templates from the actual installed cabinets, then fabrication, then install.

Other sub-coordination failures we hear in every “remodel gone wrong” story: a tile setter starting before drywall has cured, an electrician trimming out switches before paint is done (patchy cut-in), or a plumber not returning for final hookup until two weeks after the dishwasher arrived. Good coordination looks like a dedicated project manager, weekly look-ahead schedules, and every sub on a known production calendar. We run live schedules in JobTread so clients can see what’s happening and when.

“Most kitchen remodel disasters aren’t bad luck — they’re bad coordination. The contractor who can show you a written schedule with every sub on it before work starts is the contractor who’s going to finish on time.”

What Happens If Cabinet Damage Isn’t Documented at Delivery?

The mistake: a door arrives chipped or a side panel arrives scratched, nobody documents it at delivery, and 90 days later the manufacturer says “you signed for it in good condition.” The right protocol: every box, door, drawer, and panel inspected and photographed with timestamps at delivery, and anything damaged noted on the BOL (bill of lading — the carrier’s delivery receipt) before the driver leaves. Damage caused during install gets photographed immediately, before drywall returns.

  • Cost when undocumented: replacement at the homeowner’s expense, $200–$2,000+ per damaged door or panel.

What About No COI, No PA HIC, and No Real Contract?

This is covered fully in our contractor red flags guide, but it’s worth flagging here too. Any Pennsylvania home-improvement contractor must hold a PA HIC registration — ours is PA HIC #PA202519. Verify any contractor at the PA Attorney General’s lookup before you sign. Always get a current Certificate of Insurance (COI) naming you as additional insured before work begins. A kitchen remodel without a written, fixed-scope contract is a kitchen remodel that ends in a dispute.


What Life-Disruption Mistakes Do Homeowners Underestimate? (Category 5)

This is the part nobody warns you about. The contractor doesn’t move into your house — but they kind of do, for 12 to 16 weeks of elapsed time. Your kitchen is the most-used room in the home, and you’re about to lose it. Plan for that, or the disruption becomes its own kind of mistake.

How Long Will You Actually Be Without a Kitchen?

The mistake: assuming “active construction” time and “no kitchen” time are the same number. They’re not. A full kitchen remodel is typically 8–12 weeks of active construction, but elapsed time from “demolition starts” to “we’re cooking in our kitchen again” is often 12–16 weeks once you add cabinet lead times (4–12 weeks), countertop template-to-install (2–3 weeks after cabinets are set), appliance delivery, and the punch list.

The check: ask the contractor for an elapsed-time estimate, not an active-construction estimate — “How many weeks from the start of demolition until I’m cooking dinner in my finished kitchen?” Our companion piece on how long a bathroom remodel takes walks through the same elapsed-vs-active distinction for baths, and the kitchen cost guide for the Philadelphia suburbs explains how scope drives both time and price.

PhaseActive TimeWhat’s HappeningWhat You Do
Design + selections4–8 weeksLayout, drawings, every finish selectedMake decisions in batches
Cabinet lead time4–12 weeksCabinets built (overlaps with permitting)Set up your temporary kitchen
Demolition3–5 daysOld kitchen out, surprises surfaceLive elsewhere in the house
Rough-in + inspections2–3 weeksPlumbing, electrical, framing, township inspectionsApprove any change orders fast
Cabinets + countertops2–4 weeksCabinets set, countertop templated then installedConfirm appliance delivery
Finishes + punch list1–3 weeksTile, paint, hardware, final hookupsWalk the punch list

What Does a Workable Temporary Kitchen Actually Need?

The mistake: assuming “we’ll just eat out” for 12 weeks. Dining out for a family of four three-plus times a week for three months is $3,000–$5,000 in restaurant tabs and a lot of fatigue. The minimum workable temporary kitchen: a microwave, an electric kettle, a coffee maker, a toaster oven, an induction hot plate, and a real washing setup (a basement, garage, or laundry utility sink). A mini-fridge in the dining room or garage covers the bulk of weekly groceries.

Set it up in the dining room or a finished basement — not the bathroom (bad ventilation) and not the laundry room (too cramped).

  • Cost: $200–$600 if you don’t already own the equipment.

Our honest opinion: a working temporary kitchen is the single biggest difference between “the remodel was hard but fine” and “the remodel was miserable.” Plan it before demo, not after.

How Do You Keep Demolition Dust Out of the Rest of the House?

Kitchen demolition produces serious dust — drywall, tile, mortar, plaster, and sawdust. It travels through return ducts and redistributes through the whole house if nobody contains it. Prevention is zip-wall containment at the kitchen entry, plastic over the cold-air returns and supply vents in the kitchen during demo, daily HEPA vacuuming, and a fresh HVAC filter at the end of the job. This isn’t optional — it’s the difference between a clean home during construction and a three-month dust hangover on every shelf and ceiling fan.

A small one most people miss: move the pet food and water station to its new temporary spot two weeks before demo, not the day of. An anxious dog makes for an anxious household, and anxious households make rushed late-game change-order decisions.

Will Your Kitchen Be Done for the Holidays?

The mistake: starting a full kitchen in mid-September aiming to “have it done for Thanksgiving.” That’s eight weeks. The math doesn’t work for anything beyond a cosmetic refresh. A full remodel started in mid-September is more likely finished in early-to-mid January.

Our opinionated take: don’t promise Thanksgiving or Christmas hosting until the kitchen is 90% done. Plan to host at a sibling’s, a friend’s, or a restaurant. If the kitchen finishes early, host at home. If it doesn’t, you didn’t burn down the holiday.

Decision fatigue is real and predictable around weeks 3–4 of selections — a kitchen involves 80–120 individual decisions. We include design as a visible line item (not a hidden markup) specifically so there’s a professional setting the order of decisions and batching them, instead of asking you to decide everything in one overwhelming afternoon.

One of our clients hosts a major Thanksgiving party every year. They came to us in the spring wanting a full kitchen remodel done before that fall, and we planned the schedule backward from the party date. The decision that made it work: we ordered every cabinet, fixture, tile, and appliance early, took delivery, and inspected every piece — for damage, color match, hardware completeness — before demo day. By the time we touched a wall, every material was on-site and verified. A supply-chain delay or a damaged cabinet door six weeks into a job would have put the holiday at risk; catching those issues before construction started gave the schedule real cushion against the kind of late surprises that derail holiday-deadline projects.


What Can a Good Contractor Catch Early — and What Can’t Anyone Prevent?

This is the section that earns the most trust, so we’ll be specific. Honesty is the brand, and that means admitting the limits.

What you CAN catch early (and what a good contractor will warn you about, every time):

MistakeHow It’s Caught Early
Oversized islandTape out the footprint before selections lock
Broken work triangleMeasure the three legs during space planning
Trendy cabinet colorLook at decade-old high-end real-estate listings
Pendant scalePaper-template the fixtures on the ceiling
Trash far from sinkAsk “where is the trash going?” during design
Allowance trapsDemand fixed pricing, not allowances
Sub-coordination failuresAsk to see the written schedule before signing
Missed holiday deadlineAsk for elapsed time, not active-construction time

What we honestly CAN’T always prevent: behind-the-wall surprises in older homes (galvanized plumbing, rotted joists, knob-and-tube wiring, asbestos in pre-1985 homes), cabinet manufacturer shipping delays (rare, but even Shiloh and Great Northern can have them), appliance backorders (a panel-ready Sub-Zero can run 12+ weeks even when ordered correctly), township-level permit slowdowns (we don’t run the township office), and your own mid-project changes (changing the cabinet color after the order is placed is not a free decision).

What a bad contractor causes — and these are 100% preventable by hiring the right person: lowball allowance bids that balloon, no-shows, unauthorized work, cash-only deals with no contract, disappearing partway through, undocumented cabinet damage, and a wall removed without engineering. None of these are bad luck. They are choices, and you avoid them at the hiring stage.


How Does Fedor Specifically Handle These Kitchen Mistakes?

We use fixed-price contracts, so there are no allowance overruns — every selection is locked before you sign, and the number in your proposal is the number you pay. We run in-house crews plus long-term trade partners (S.B. Electric, AA to Z Plumbing, Rise Engineering for structural), and you get live schedule and budget visibility through the JobTread client portal so you’re never wondering what happens next. Our selections process runs with a designer, not a “we’ll figure it out” approach.

We specify Shiloh (semi-custom) and Great Northern Cabinetry (custom) — both real plywood-box construction with full-extension undermount soft-close drawer slides — and source from Weinstein Supply, Ferguson, Avalon Flooring, The Tile Shop in King of Prussia, and Gerhard’s Appliances in Malvern, vendors who coordinate with our schedule. We work throughout Chester County, Delaware County, and the Main Line; we’re PA HIC #PA202519, fully insured, COI on request, and we’ve turned down projects that weren’t a good fit. If you want to see exactly how we work step-by-step, here’s our full process, and if you want to know who we’re a good fit for, are we the right fit?

What we tell our clients: The most expensive kitchen mistakes are the ones you can’t see coming — and our entire job is to see them coming for you. Before we start, we tape out islands on your real floor, we put cabinet thickness and drawer-slide brand in writing, we lock every appliance dimension before a cabinet is ordered, and we hand you an elapsed-time estimate, not a feel-good active-construction number. When we find galvanized pipe or a knob-and-tube run behind the wall on day two of demo — and in a 1960s split-level in Newtown Square in Delaware County or a 1940s stone home in Wayne on the Main Line, we often do — we stop, show you, and price the options before anyone spends a dollar. We tell clients the same thing every time: the goal isn’t a kitchen with zero surprises, because no honest contractor can promise that in a pre-2000 home. The goal is that every surprise is one we caught, documented, and explained — instead of one you discover in a final invoice that’s $23,000 over the bid. That’s the difference between a remodel you’re glad you did and one you spend a year resenting. We’d rather lose a job at the estimate than win it with a number we know won’t hold.


Next Step

You’re Already Avoiding the Biggest Mistake by Reading This

If you’ve read this far, you’re doing the homework most homeowners skip — and you’re already in a much better position to avoid the mistakes above. Here’s what we’d suggest next:

Read our guide on how to choose a remodeling contractor — especially if you’re getting multiple bids. Every red flag in Category 4 is a question you can use on the next contractor’s estimate.

Talk through your specific kitchen. If you want to walk your space with the owner — what you’re thinking about, what could go wrong, and what it would actually cost in a range — book a free consultation. No pressure, no same-day signing. Here’s what to expect at your first consultation and how to prepare for it.

Or call us directly: 610-431-7150 · PA HIC #PA202519


Frequently Asked Questions

What is the most common mistake in a kitchen remodel?

The most common mistake is an oversized island that breaks the workflow – a 9-foot island in a kitchen with about 8 feet of clearance per side. The NKBA recommends a minimum of 42 inches of walking clearance around an island (48+ inches for two cooks). It costs $0 to prevent at design time and $8,000 – $25,000 to fix after install, including a new countertop and often island electrical relocation.

What’s the biggest design regret homeowners have?

The most-cited regrets are open shelving used as primary daily storage, trend-driven cabinet colors, and a busy backsplash fighting a busy countertop. Each is roughly a $1,500 – $8,000 fix after install. All three are free to prevent if you raise them during the selections phase, which is exactly why bringing them up early matters.

What’s the work triangle and why does it matter?

The work triangle is the path between sink, stove, and refrigerator. The NKBA guideline is a total of no more than 26 feet across the three legs, with no single leg over 9 feet or under 4 feet. Modern zone-based design has expanded the idea, but proximity still rules. Fixing a broken layout after install starts around $15,000 and can exceed $60,000.

Are marble countertops a mistake in a kitchen?

In a working family kitchen, usually yes – marble etches from any acid (lemon, vinegar, tomato, wine), and sealing slows staining but does nothing for etching. Marble-look quartz from Cambria, Caesarstone, or Silestone gives roughly 90% of the visual at 100% of the durability. Replacing etched marble runs $4,000 – $15,000+.

Why do kitchen remodels go over budget?

The number-one reason is allowance overruns – a lowballed cabinet allowance cascades into the countertop, tile, and appliance allowances, so a $55,000 bid finishes at $78,000. Number two is behind-the-wall surprises in the pre-2000 homes common across Chester County, Delaware County, and the Main Line; number three is mid-project scope changes. Fixed-price contracts eliminate #1 entirely, which is why we use them. Our kitchen cost guide breaks the numbers down further.

Should I do open shelving in my kitchen?

Our honest opinion: most clients who specify open shelving as primary daily storage regret it within a year – dust, cooking grease, mismatched dishware, and the constant pressure to keep it styled. It works as a single accent run with display-only items in a lightly used kitchen or one with a butler’s pantry doing the real work. It fails as the place you store every cereal bowl. Converting it back to closed cabinets later runs $1,500-$5,000+, so decide honestly during selections, not after.

How long is a kitchen remodel actually?

Active construction is typically 8 – 12 weeks, but elapsed time from demolition to cooking in the finished kitchen is usually 12 – 16 weeks, with another 4 – 8 weeks of design and selections before construction even starts. Plan around the elapsed number, not the active number – and ask your contractor for an elapsed-time estimate specifically.

How do I avoid getting ripped off by a kitchen contractor?

Verify the PA HIC license at the PA Attorney General’s lookup, request a Certificate of Insurance naming you as additional insured, demand fixed pricing instead of allowances, and ask to see the full project schedule before you sign. Fedor’s PA HIC is #PA202519. Our how to choose a remodeling contractor and contractor red flags guides go deeper.

What should I do before my kitchen remodel starts?

Lock every selection before demo, set up a temporary kitchen with a microwave, hot plate, and sink access in the basement or laundry area, move the pet food station two weeks early, and confirm the elapsed-time estimate (not just active construction) with your contractor. Do not promise holiday hosting on the new kitchen until it’s 90% done. Our how to prepare for your remodeling consultation guide helps you arrive ready.


Sources and References

  • Pennsylvania Attorney General — HIC License Verificationhicsearch.attorneygeneral.gov. Verify any PA contractor’s Home Improvement Contractor registration before signing. Fedor Fabrication: PA HIC #PA202519.
  • PA Department of Labor & Industry — Uniform Construction Code (UCC)dli.pa.gov. Pennsylvania’s adopted building code, including the residential electrical and structural requirements referenced above.
  • 2018 International Residential Code (IRC)codes.iccsafe.org. The base code adopted in Pennsylvania for residential structural and electrical work, including load-bearing wall and countertop receptacle requirements.
  • NKBA Kitchen & Bath Planning Guidelinesnkba.org. The trade reference for the work triangle, island clearance, and other planning standards cited here.
  • AWI Quality Standardsawinet.org. Architectural Woodwork Institute grading for cabinet construction quality.
  • PA Bureau of Consumer Protectionattorneygeneral.gov. Where to file and research home-improvement contractor complaints in Pennsylvania.

Related Guides